pelargonium guide & flowery photo album

Showing posts with label pelargonia. Show all posts

plants all over and not a flower in sight

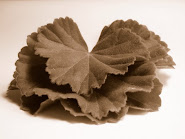
so we'll have to make do with this painting while we wait for the buds to arrive. at least it's got a pelargonium in it ;-)
while i've been waiting away, this blog has turned a magic corner; the number 1000. more than one thousand visits from all over the world! i mostly blog for my own sake and yet i think it's great that you all stop by - thanks. especially on this blog, where i am trying to compile helpful tips and information. sitemeter shows me what people came looking for and i get really excited when people come here looking for some info that is actually here. and i have a long list now of information that is not, for future posts of pelargonia madness :-D
visitor # 1000 came here via google looking for info on "pelargonium soft cuttings" - i think this person would have had any questions on that subject answered by previous posts but still; if any of you have any questions, fire away and i'll do my best to answer them.
i'll be back soon - hopefully with pictures of blooming pellies.

how to propagate pelargoniums from cuttings

one of the wonderful things about pelargoniums is that they are so easy to propagate. it can be done by seeds if you're looking at growing species or F1 cultivars but the easiest way - and the only way for most cultivars - is by taking cuttings. here's how to do it:

:: THE POTS ::
i prefer terracotta. i think they're prettier and better for the environment but most importantly, they drain faster and pelargoniums don't like to get their feet wet. you'll need to soak the pots before use. put them in a bucket of water for at least a couple of hours. if you're reusing old pots, it's real smart to make sure you don't transfer any bacteria or virus to your new plants so put some disinfectant in the water. i use chlorine.
use the smallest possible pot. for cuttings, i use the ones that are 6 cm in diameter at the top. they're tiny, i know, and you'll need to re-pot most plants fairly soon. it is easier, however, to give good care with these small pots. you can water them without risking water log as they are small enough to drain quickly. and you'll see more quickly when the plant is strong enough to receive fertilizer by the size of the roots.

:: THE SOIL ::
for cuttings you'll need to use a neutral soil - same as you'd use for seeds or any other cutting. some people prefer to use only this in the beginning and then mix it later but i use mixed soil from the beginning to make sure there will be drainage right the core of the root system.
i mix one half growing soil with another half of leca and coarse sand. the leca needs to be the smallest size, 2-4 mm, and if you can't get your hands on that then stick with sand. i buy the sand in a pet shop, the kind used for birds is sterilized and therefore perfect. otherwise you can use a mix of beach sand and gravel and then sterilize it by baking it in the oven!

:: THE CUTTING ::
take a look at the old plant, it will probably have some new shoots. it might seems brutal to cut it but remember that the more branches your plant has, the more flowers you'll see. after a long winter, most cultivars are happy to get a good trim and you can also shape your old plant in this way.
remember that it is not necessary to cut your plants! a lot of books & sites write about trimming as if it's something you have to do but it's not. it's about propagation, aesthetics and perhaps giving cuttings to someone else. quite a few of the pelargonium freaks i've met or heard of keep a small version of every plant they have in their collection in order to be on the safe side if something should happen to the mother plant :-) i trim my plants if they look like they are struggling too much or if they've grown completely out of shape. some people do it to save room over the winter. and then, off course, the cuttings are excellent to swop if you are after new kinds of pelargoniums.

new plants grow best from a fresh shoot, so find one of those soft green ones that looks really succulent and eager. you don't want one where the leaves are really far apart as will happen if the plant is reaching too far for light. the strongest part of the stem is close to the tip, so short cuttings will be the healthiest.
when you've found a good place to cut, do it just above a node. a node is where leaves, branches or stipuli grows or has grown. if nothing is there, it'll look like an eye on the stem.

:: PREPARATION OF THE CUTTING ::
cut of the bottom part of the stem, just below a node. the nodes is where growth appears and in this case it'll be new roots. uh, by the way, if you don't already know it, you can click on each picture to get a bigger version to see better what the ... i'm talking about :-)

remove all leaves from the bottom up, so that there's only two left - if the leaves are really new or small, you can leave three. do this to make sure there not too big areas of dehydration and to make sure the new plant will use it's energy on building strong new roots. if there are any flower buds, it is crucial that you remove them too, for the same reason.
you will also need to remove the stipuli; the tiny green "leaves" that sits in most nodes, see the picture if you're in doubt.

finally, i use a solution of vitamin C to give the plants a good head start. i use the tablets that can be dissolved but i know vitamin C is available in powder and will do just as well. you need to stir it with something that is not metal in a small glass or vase and then leave the cutting in it for a while.


:: PLANTING ::
cover the drainage hole with bigger leca or a small piece of a broken pot to keep the bottom of the pot clean and ensure good drainage.
fill up the wet pot with the soil mix and make a hole in it, for example with a pencil. stick the cutting in and make sure that at least three nodes are covered.
place the pot in water so that it's emerged at least half way. very quickly the soil will become moist and you should remove the pot from the water before the soil is completely soaked.
afterwards, simply place your new friend in your lightest space and make sure that it is warm. i stick them in my window sill and crank the radiator beneath as i refuse to invest in a propagator. this way they have lots of light and get warmth from below and i just have to make sure that they are continuously moist.
do not cover them, as is suggested with some plants! pelargonium cuttings need to have moist soil but dry leaves as they are very prone to rotting.
oh, and, if you know the name of the mother plant, it's smart to stick a plant label in the pot ;-)

:: CARE ::
in a few weeks, the cutting will have new roots and your friend is well on it's way. when you see the roots - either because they stick out through the drainage hole or because you gently look down the sides inside of the pot you should start following their growth. this will depend on the type/size of the mother plant, but when the roots shoot through most of the small pot, it is time to either start fertilizing or transplant it too a bigger pot with normal soil. this will, for most normal types of cultivars be after 4-6 weeks. in these weeks it the most important to make sure the soil is constantly moist.

GOOD LUCK!

pelargoniums & tropical climates - species

can pelargoniums grow in tropical climates? i received this question and am hesitant to answer as i have no direct experience with those circumstances yet i have a few suggestions...
!WARNING! the following might be a tranquillizer for anyone who is not a plant geek!

as the true species grow in places like Africa & Australia, most of them like a lot of light and can tolerate quite high temperatures. since the species can grow in very hot conditions i believe they would be the best choice for tropical climates. i also find that even though they are not as showy as the mixed, bred and cultivated pelargoniums, their flowers have more variation and are more elegant.

the main concern for all pelargoniums would be the constant humidity.the majority of species pelargoniums grow in dry and sandy or rocky regions but some come from areas with occasional heavy rain fall. these are the ones i would go for in a hot and humid home. i'm absolutely no expert on the true species but i do know that in eastern Africa, the subgroups Cicinium and Polyactium get as much as 1500 mm rain a year. still, pelargoniums dislike soggy feet no matter where they grow so it would be even more important to keep the watering down if the air humidity is high. to ensure dry feet try these tips:
- use only clay/terracotta pots.
- make sure to use a pot that is small enough, i.e. not much bigger than the root system.
- use a mixed, well draining soil. example: one quarter of something light such as perlite, one quarter of soil with lots of structure (for instance a mix with peat), one quarter of leca (2-4 mm), and one quarter of coarse sand. i buy the kind of sand used for birds as it is already sterilized.
- avoid overhead watering which can encourage fungus and disease. water in the tray and only spray mist the top soil.
- and make sure the water is needed; check to see if the soil is really dry, below the soil surface, before watering.
- provide good ventilation.

unlike the cultivars, species pelargonium can be grown from seeds. however, germination can be erratic, taking from a few days to several months so patience can be required! some suggest scalding the hard shelled seeds with boiling water, some advise to sand them lightly. the softer seeds are definitely quicker to germinate.
again, i guess that constant humidity would be the biggest problem. make sure that the containers are sterilized to disencourage fungus. i soak the pots in 1:10 chlorine and water in a bucket for a day or so before planting.
during germination, the soil should be kept moist but never wet. also, the containers should be placed in a bright spot but not in direct sunlight.
when the growth is showing, harden the tiny plants gradually with more and more direct sunlight - but start slowly.

seeds can be obtained from:
B & T
exotica
Silverhill Seeds - experts with an extensive selection.

finally, some suggestions for species pelargoniums for tropical climates:
my best bet is P. tongaense as it originates from an area with high humidity. it is very beautiful, grows easily and if you place it in partial shade it will thrive. others that like partial shade: P.crispum, P.graveolens, P.zonale, P.inquinans, P.peltatum.
for full sun try P. cucullatum or P.denticulatum.
more suggestions: P.grossularioides, P.tometosum or P.cordifolium. the lovely P.odoratissimum (a.k.a. apple geranium) likes shade and a lot of water. another scented that i think would work is P.citronellum. finally, one of my absolute favourites; P.sidoides. since it is a strong grower i think it would have a chance as well.

keep in mind that this is all ideas and suggestions, i have never tried it myself. good luck and please know that i'm very curious as to how this turns out ;-)

pelargoniums & tropical climates - cultivars

can pelargoniums grow in tropical climates? i received this question and am hesitant to answer as i have no direct experience with those circumstances yet i have a few suggestions...
!WARNING! the following might be a tranquillizer for anyone who is not a plant geek!

if looking for regular cultivars, one should definitely stay clear of regals as they were bred to do well in cool climates and will only bloom with after a cool winter.
stellars, uniques and regular zonals would be my choice, even though none are tropical. they prefer the same lower humidity we do, not the humid hothouse conditions of, say, orchids. yet they are quite hardy and grow quickly which is the way i imagine it to work; once they have a good size, they can overcome a lot!

the main concern for all pelargoniums would be humidity. as the true species originate from places like Africa & Australia, most of the cultivars can tolerate quite high temperatures. but pelargoniums dislike soggy feet no matter where they grow so it would be even more important to keep the watering down if the air humidity is high. to ensure dry feet try these tips:
- use only clay/terracotta pots.
- make sure to use a pot that is small enough, i.e. not much bigger than the root system.
- use a mixed, well draining soil. example: one third soil with lots of structure (for instance a mix with peat), one third leca (2-4 mm) and one third of coarse sand. i buy the kind of sand used for birds as it is already sterilized.
- avoid overhead watering which can encourage fungus and disease. water in the tray and only spray mist the top soil.
- provide good ventilation.

for stellars it would also be vital to ensure shading as they do not like intense sun. zonals dig the sun better but no pelargonium can survive day long direct, tropical sun. uniques stand sun better than any other pelargonium cultivars.

a last suggestion of cultivars would be the scented varieties. if can get your hand at one that already a good size, it will actually need quite a lot of water.

finally, here's a list of pelargonium cultivars that are strong & stubborn growers in my personal experience:
zonals: Dryden/Santa Monica, Red Explosion, Distinction.
stellars: Arctic Star, Snowflake, Vectis Glitter.
uniques: Paton's Unique, Key's Unique, Old Scarlet Unique.
scented: Ardwick Cinnamon, Staghorn Oak, Chocolate Blotch.

pelargoniums & winter

many people who likes to have pelargoniums in their garden over the summer tend to buy new ones each year. this is not necessary at all if you have a little bit of space in a cool but bright place.
there are several ways to store your beloved granny plants for hibernation. i'll describe what works for me. please bear in mind that i'm only writing about the ordinary zonals in this post, not miniatures, species or other types.
::TRIMMING::
big plants that are at least a year old, preferably two, and have strong growth, lots of roots and healthy foliage can be cut back by about one third. i use cinnamon powder on the "wounds" they receive in the process of trimming to help prevent fungus, rotting etc.
::LIGHT::
the most important thing to consider for overwintering is light. there are tips out there about packing them in cardboard boxes, hanging them upside down in their roots or in plastic bags... it's not only my silly love for pelargoniums that makes me shun these methods it's also the simple fact that only a few of the strongest can survive this kind of treatment. they need light. not necessarily direct sun but they do need as much daylight as possible. if you live in the far north you'll probably have to give them artificial light (can be a cheap fluorescent lamp).
::TEMPERATURE::
pelargoniums don't mind cold but they cannot stand frost. after over watering, frost is the biggest killer. i find that the lowest they tolerate is about 5 degrees Celsius. ordinary kinds don't fare well with heat either, that's why you can't just keep them all in you living room... well, you can but they'll grow in twisted ways and will have less flowers next summer. a cool place is cool with them.
::WATER::
the rule to go by is: the less light, the less water. in early winter and at the beginning of spring, i water my pelargoniums once a week. in the dead of winter i only spray the top soil with water and then water enough to reach about 1 cm around the bottom of the pot. i never water them from the top.
::CONTAINERS::
since i have lots of window sills to use, i keep each pelargonium in the same pot that it has had during the summer. never give new soil, never plant in bigger pots - this you can do in spring. i actually tend to be sure that the roots are a bit crammed - it's a good way to ensure you don't kill by over watering.
the other way to do it if you have little space is more brutal but it works! take a box and a lot of sand. styrofoam works best (i know, not very sustainable, sorry, but at least this way the damned stuff will be used for a good purpose ;-). cover the bottom of the box with a few centimetres of sand. tease as much soil off the roots as you can ... and here comes the really brutal part: cut the plant back by 2 thirds! then pack the plants closely, cover roots & soil with sand and finally moisten the sand. with this method you do not water. no water at all! but please remember that this only works for pelargoniums with age & roots enough.
::FERTILIZER::
nothing. zip. zero. i give less & less in the last month of summer and then stop. not until spring & new leaves arrive do i start again.
::LOVE::
of course you need to give them some loving... when i check (and perhaps water) them once a week or so in winter time, i make sure to remove dead leaves and spread some good vibes. after all, they brighten the other three seasons considerably for me :-)

flower power Mama

some flowers my mother has chosen for her new garden.

the life of a pelargonium freak...


i love my pelargoniums. (surprise, surprise...) and i love to water them, speak with them and re-pot them.
last week i realised that since autumn is here and winter will be soon, i had better prepare them.
all of them...
i put all my left over terracotta pots in buckets of water with a drop of bleach and let them soak for a few hours.
i mixed earth, small leca, sand and peat (sorry, not very sustainable, i know) in a gargantuan tub.
i made new nameplates for every recent, growing baby.
i cleared my kitchen tables.
then i took a deep breath and began...
i started with miniatures, cuttings and growing babies.
i recently bought 8 tiny but kind of tall, very old pots at a flea market. they now serve as new homes for my miniatures. still not too much space around them but more beneath so that they can stretch their roots, i think they're happy. and so am i, they are very pretty and more visible now.
i then proceeded to give small pots (max 6 cm) to the too many cuttings i've made this summer. well, i actually didn't have enough pots so some of them still has to suffer plastic or living in a coop as long as they haven't found a new home or i've given up on them.
after that i was already exhausted from carrying dirt around and trying to figure out which plant goes in which pot, so i had to take a nap ;-)
the sepia photo shows the miniatures in their fancy new pots and my ready-for-napping couch.

afterwards - and after more coffee - i started the real chaos.
dirt, wet pots, nameplates, wet'n'dirty plants lists and the poor pelargoniums all over the kitchen tables. the kitchen floor. the living room floor. as the evening approached i wondered how i was ever going to make it to bed... as the evening passed i didn't much like the idea of having to sleep next to an ocean of plants - they were now also covering the bedroom floor... i guess aesthetically it is appealing but as far as i know it's not very healthy. hm. the joys of being a balcony gardener?
next morning i found the joy again. it was so much fun to see my apartment having a sun dappled pelargonium ocean for a floor. but then the chaos started again. where to put all of them? in what order? after moving them all around a trizillion times i was satisfied, knackered and laughing at the life of a pelargonium freak. i do love my pelargoniums. i do. but to spend an entire weekend replanting & reorganising seems a wee bit crazy :-D
these days i make sure to enjoy the colours.................. before everything will fade to black and white.

a visit with Monica - hero of mine...

Monica lives in a sea of flowers. a colourful world that shocks your senses with scents, variations of colour and soft sensations beneath your fingertips.


i'm not sure i could ever find the energy to care for this many flowers but how i admire Monica & her husband for finding it! there must be more than a thousand...
a few of the prettiest regals, a sweet selection of scented, several angels, uniques and ivy-leaved, and a top class collection of species and species hybrids. AND THE ZONALS!!! bright stellars with several colours in leafs as well as flowers, birds eggs flowered, formosums, speckled, fancy leaved, beautiful rosebuds & tulips, my beloved dwarfs and the itsy-bitsy-cutesy miniatures.... hundreds upon hundreds of zonals... my head was spinning with deligth :-D

Royal Botanic Garden Edinburgh I