:: THE POTS ::
 i prefer terracotta. i think they're prettier and better for the environment but most importantly, they drain faster and pelargoniums don't like to get their feet wet. you'll need to soak the pots before use. put them in a bucket of water for at least a couple of hours. if you're reusing old pots, it's real smart to make sure you don't transfer any bacteria or virus to your new plants so put some disinfectant in the water. i use chlorine.
 use the smallest possible pot. for cuttings, i use the ones that are 6 cm in diameter at the top. they're tiny, i know, and you'll need to re-pot most plants fairly soon. it is easier, however, to give good care with these small pots. you can water them without risking water log as they are small enough to drain quickly. and you'll see more quickly when the plant is strong enough to receive fertilizer by the size of the roots.
:: THE SOIL ::
 for cuttings you'll need to use a neutral soil - same as you'd use for seeds or any other cutting. some people prefer to use only this in the beginning and then mix it later but i use mixed soil from the beginning to make sure there will be drainage right the core of the root system.
 i mix one half growing soil with another half of leca and coarse sand. the leca needs to be the smallest size, 2-4 mm, and if you can't get your hands on that then stick with sand. i buy the sand in a pet shop, the kind used for birds is sterilized and therefore perfect. otherwise you can use a mix of beach sand and gravel and then sterilize it by baking it in the oven!
:: THE CUTTING ::
 take a look at the old plant, it will probably have some new shoots. it might seems brutal to cut it but remember that the more branches your plant has, the more flowers you'll see. after a long winter, most cultivars are happy to get a good trim and you can also shape your old plant in this way.
 remember that it is not necessary to cut your plants! a lot of books & sites write about trimming as if it's something you have to do but it's not. it's about propagation, aesthetics and perhaps giving cuttings to someone else. quite a few of the pelargonium freaks i've met or heard of keep a small version of every plant they have in their collection in order to be on the safe side if something should happen to the mother plant :-) i trim my plants if they look like they are struggling too much or if they've grown completely out of shape. some people do it to save room over the winter. and then, off course, the cuttings are excellent to swop if you are after new kinds of pelargoniums.
 new plants grow best from a fresh shoot, so find one of those soft green ones that looks really succulent and eager. you don't want one where the leaves are really far apart as will happen if the plant is reaching too far for light. the strongest part of the stem is close to the tip, so short cuttings will be the healthiest.
when you've found a good place to cut, do it just above a node. a node is where leaves, branches or stipuli grows or has grown. if nothing is there, it'll look like an eye on the stem.
:: PREPARATION OF THE CUTTING ::
 cut of the bottom part of the stem, just below a node. the nodes is where growth appears and in this case it'll be new roots. uh, by the way, if you don't already know it, you can click on each picture to get a bigger version to see better what the ... i'm talking about :-)
 remove all leaves from the bottom up, so that there's only two left - if the leaves are really new or small, you can leave three. do this to make sure there not too big areas of dehydration and to make sure the new plant will use it's energy on building strong new roots. if there are any flower buds, it is crucial that you remove them too, for the same reason.
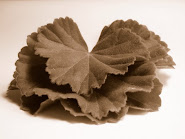
you will also need to remove the stipuli; the tiny green "leaves" that sits in most nodes, see the picture if you're in doubt.

finally, i use a solution of vitamin C to give the plants a good head start. i use the tablets that can be dissolved but i know vitamin C is available in powder and will do just as well. you need to stir it with something that is not metal in a small glass or vase and then leave the cutting in it for a while.
:: PLANTING ::
 cover the drainage hole with bigger leca or a small piece of a broken pot to keep the bottom of the pot clean and ensure good drainage.
fill up the wet pot with the soil mix and make a hole in it, for example with a pencil. stick the cutting in and make sure that at least three nodes are covered.
place the pot in water so that it's emerged at least half way. very quickly the soil will become moist and you should remove the pot from the water before the soil is completely soaked.
afterwards, simply place your new friend in your lightest space and make sure that it is warm. i stick them in my window sill and crank the radiator beneath as i refuse to invest in a propagator. this way they have lots of light and get warmth from below and i just have to make sure that they are continuously moist.
do not cover them, as is suggested with some plants! pelargonium cuttings need to have moist soil but dry leaves as they are very prone to rotting.
oh, and, if you know the name of the mother plant, it's smart to stick a plant label in the pot ;-)
:: CARE ::
 in a few weeks, the cutting will have new roots and your friend is well on it's way. when you see the roots - either because they stick out through the drainage hole or because you gently look down the sides inside of the pot you should start following their growth. this will depend on the type/size of the mother plant, but when the roots shoot through most of the small pot, it is time to either start fertilizing or transplant it too a bigger pot with normal soil. this will, for most normal types of cultivars be after 4-6 weeks. in these weeks it the most important to make sure the soil is constantly moist.
GOOD LUCK!


4 comments:
May all the blessings of the dryads be upon you ... and other spirits/gods/forces of influence OR .. Just a screaming heartfelt than you!
I have never yet read a site as simple, direct, helpful and well written!
Thank you!
Charmaine - thank you ever so much; your compliments goes directly to my blogging heart as i myself want blogs with a subject to be simple, direct and helpful.
i tried to look you up but you seem to be the secretive type, which i can relate to ;-) and yet i wish i could check out your blog.
Genial dispatch and this enter helped me alot in my college assignement. Say thank you you as your information.
Thank you for the information. Interesting about the soluble vit. C drink for the cuttings. I've not heard of that. I use the oven for sterilising sand and gravel but wonder if anyone has used the microwave?
Margaret
Post a Comment